
Wix template change ~15 min 2,986 words

Change Wix Website Template: A Safe, SEO-Friendly Guide

Change Wix Website Template: A Safe, SEO-Friendly Guide

You can't change a Wix website template on an existing site. There's no swap button hiding in the editor, even if you haven't added a single word of content yet. To change Wix website template safely, you build a replacement site beside the original, prove it works, and only then move your domain. That's a migration, and treating it like one protects your rankings, bookings, orders, and forms.

Table of Contents

What Survives a Wix Template Change and What You Rebuild

After a site is created and its template is selected, the template cannot be directly replaced, according to the Wix support article on getting a new template for your site. Wix's workaround is to create a separate site, choose the desired template there, and rebuild or transfer selected materials. You can hold multiple sites in one account, so build the replacement alongside the original and compare them before anything public changes.

That structure changes how you budget time. Pages, elements, and media can be copied selectively, but the complete design, theme, and layout don't transfer as a unified package. Navigation, page structure, responsive layouts, forms, and app configurations are rebuilt by hand. Wix's own documentation on switching your site template names at least two transferable feature categories, Business Email and Wix Blog, and more than ten categories that cannot be transferred directly, alongside the transferable domain and Premium plan.

What Transfers to a New Wix Site and What Needs Checking

Item Moves to New Site? What You Do
Domain Yes, reassign after launch Disconnect from the old site and connect it to the new one
Premium plan Yes, can be transferred Reassign the plan so billing carries over
Pages, elements and media Copy selectively Copy by hand, then check layout and links
Theme, design and layout No, not as one package Rebuild in the new template
Business Email Check separately Confirm mailboxes still work after the move
Wix Blog Check separately Check post URLs and categories after the move
Premium apps Check separately Reinstall and reconfigure each app
Contacts and site members Check separately Export a copy and re-import where needed
Inbox messages and invoices Check separately Save copies before switching
Wix Stores Check separately Validate products, orders and store settings
Wix Bookings and Wix Video Check separately Rebuild and test each one
Email marketing and marketing integrations Check separately Reconnect and test sign-up forms

Don't assume Business Email and Wix Blog move automatically just because they're listed as transferable. Confirm each mailbox, post URL, and category item by item before launch. The same caution applies to premium apps, contacts, site members, inbox messages, invoices, Wix Stores, Wix Bookings, Wix Video, photography apps, email marketing, and marketing integrations.

For broader context on how Wix handles search settings during a rebuild, this guide to SEO with Wix covers the platform controls you'll need to recheck.

Quick test: If you only want new colors or fonts, your current editor's design settings may be enough. If the layout or template itself must change, plan a new site.

That one decision saves people from wasted work. A cosmetic refresh inside the existing site is fast and carries no migration risk. A true template change is a rebuild project with a checklist, backups, staging, and post-launch checks, so only start it when the new layout is worth that effort.

Back Up Everything Before You Touch the Live Site

Many items can be copied or reassigned, but that doesn't mean you should trust the old site as your only copy. If an app doesn't transfer cleanly or a setting resets, an outside backup is what lets you rebuild without guessing. Work through this list before you create the replacement.
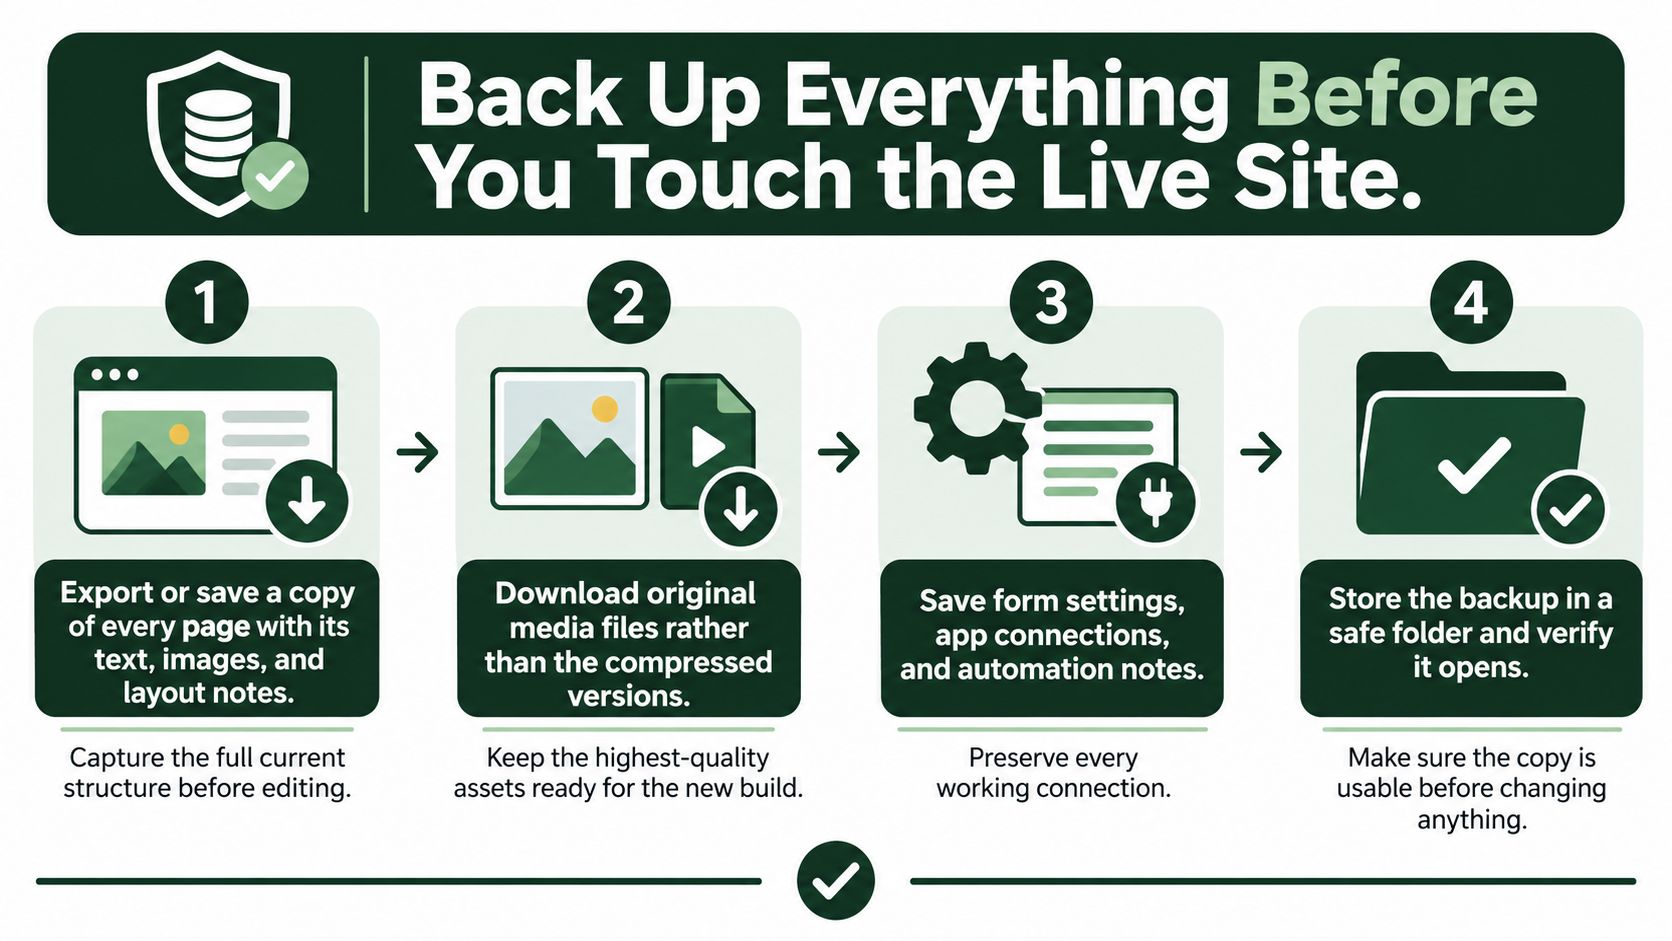
A four-step infographic illustrating essential website backup procedures before performing any changes to a live site.

The Backup Checklist

  • Save every page: Export or copy each page's text, images, and layout notes so you can rebuild sections in the right order.
  • Download original media: Keep the highest quality files, not the resized versions displayed on the site, so images stay sharp in the new design.
  • Record URLs and metadata: Put every page's URL slug, page title, and meta description in a spreadsheet, because that's what search engines already know.
  • Export the sitemap list: Save the full URL list and note which pages are indexed in Google Search Console.
  • List apps and forms: Write down every installed app, integration, and form, plus its settings and the account it connects to.
  • Save customer records: Export contacts, form submissions, and inbox messages, and download invoices and billing details.
  • Export store data: If you run Wix Stores, save the product catalog, tax and shipping settings, and order history.
  • Note domain details: Record your registrar and keep a note of the current connection so the later domain move is deliberate, not rushed.

Record Your Baseline

Pull baseline traffic and your top landing pages from analytics before you start. Without a before picture, you can't tell whether a dip after launch is a migration problem or normal variation. Note which pages earn the most visits, leads, and sales, and mark them for extra testing.

Finish with a go or no-go date and a named person responsible for each backup item. A checklist with no owner drifts. One owner per category, such as media, store data, and Search Console, keeps gaps visible before they become launch-day surprises.

How to Build the Replacement Site Step by Step

Build the new site as a controlled copy first and a redesign second. If you change layout, wording, and URLs all at once, you won't know which change caused a drop in traffic or enquiries. Match the old site's content and structure in the new template, prove it works, then improve it after launch.
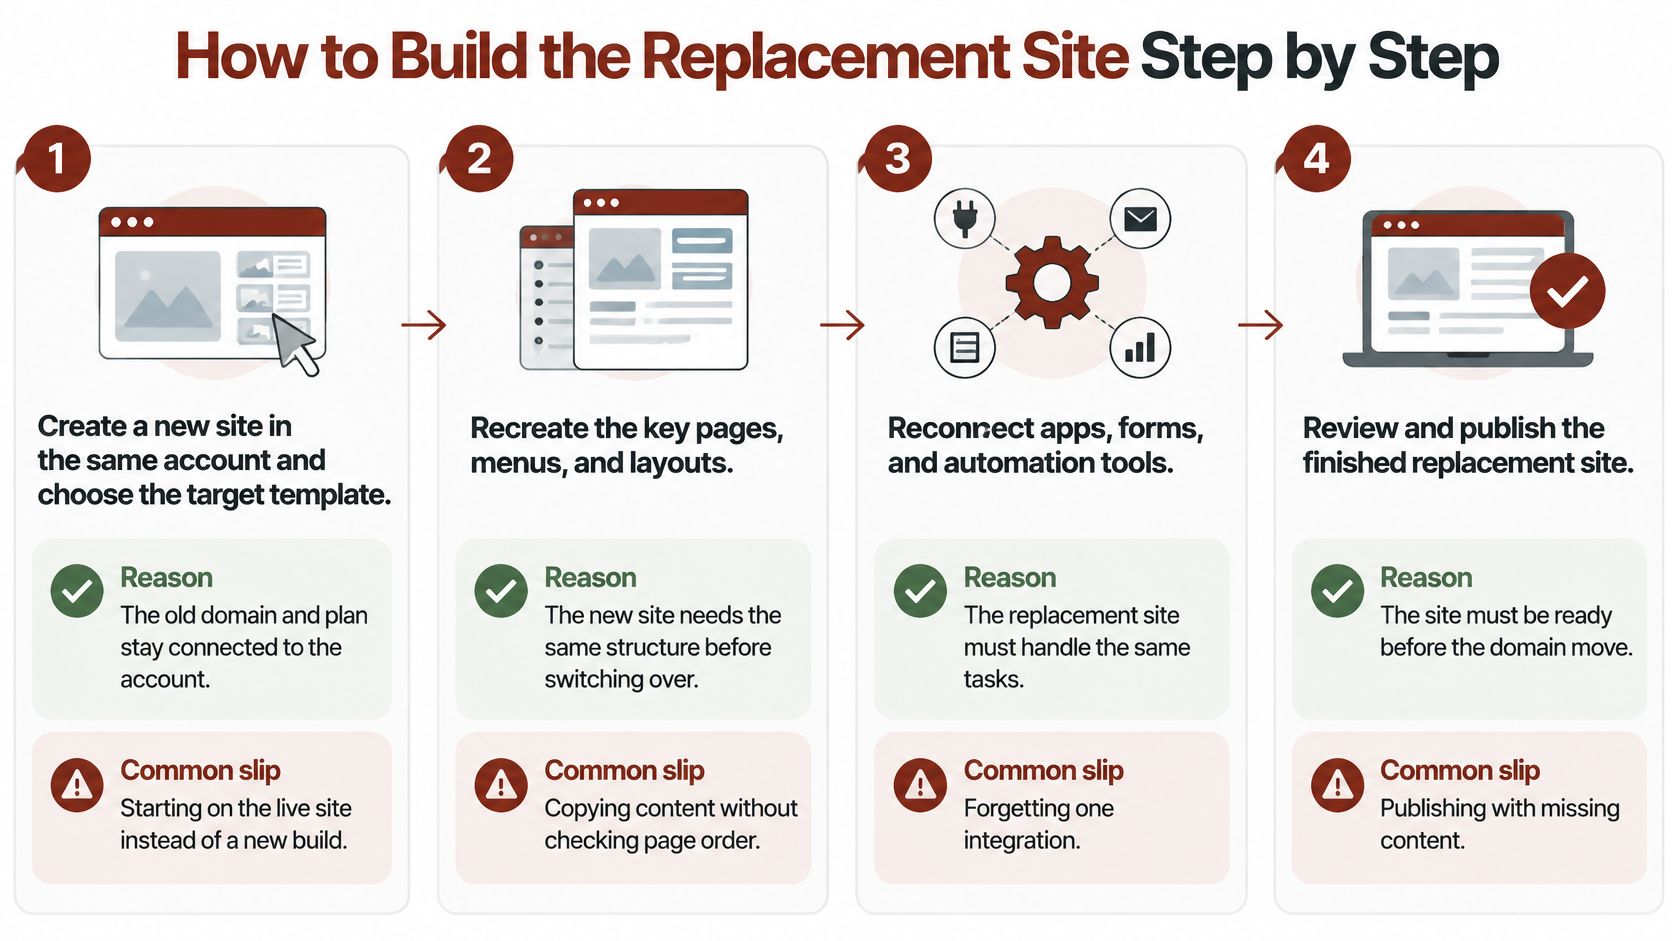
A four-step infographic illustrating the process of building a new website template to replace an existing one.

The Build Sequence

  1. Create a new site in the same account and choose the target template. Your old domain and Premium plan stay attached to the live site while you work, so visitors see no half-finished pages. The common slip is editing the live site and calling it progress.

  2. Match the site settings to the original. Set the language, business name, contact details, and currency exactly as they are now. Leaving default business info in place is a frequent error, and it can show up in your footer, invoices, and local listings.

  3. Copy pages across one at a time, keeping every URL slug identical. Page order and slugs carry your existing search visibility. Changing a slug here, even to something tidier, is the most common cause of ranking loss in a rebuild.

  4. Upload original media files. Fresh uploads keep images sharp at the new template's display sizes. Re-enter alt text as you go, because copied elements don't always bring it with them, and blank alt text is easy to miss later.

  5. Rebuild the header, footer, and menus to match the old structure. The layout doesn't transfer, so recreate menu order, footer links, and contact details by hand. Check that every menu item points to the corresponding new page, not a template placeholder.

  6. Reinstall and configure each app. Start with the ones that earn money or capture leads, such as forms and bookings, then work through the rest. Don't assume settings survived, because an installed app with default settings looks finished while doing nothing useful.

  7. Rebuild forms and send a test submission. Confirm the message reaches the right inbox and any notification or automation fires. A form that displays correctly but sends nowhere is the quietest failure in a migration.

  8. Set up the store, if you have one, and place a test order. Recreate products, taxes, shipping, and payment methods, then buy something yourself. Check the confirmation email, order record, and refund path before real customers test them for you.

  9. Review every page on desktop and phone, side by side with the old site. Look for missing sections, broken buttons, cropped images, and text that overflows on small screens. Fix differences now, while the old site is still live for comparison.

The Content Match Check

Before any SEO or publishing work begins, confirm the new site matches the old one in content and navigation. Every page you intend to keep should exist, sit in the same place in the menu, and carry the same core text. Pages you're deliberately dropping go on a separate list, because they'll need redirects rather than silence.
SEO content setup

Plan and publish SEO content with AutoSEO

Enter your site to scan it and build a keyword plan. Review your articles and connect your site for publishing. $39/mo per website.

Review before publishing Cancel anytime 30-day money-back

Protect Rankings With URLs, Redirects and Metadata

Most owners assume a new look is harmless to search traffic because the domain stays the same. That assumption is wrong. You're not repainting the same house, you're moving into a new one and hoping Google finds every room at the same address. Wix explicitly warns that moving to a new template or site can affect search-engine optimization, so treat rankings as something to defend, not something that follows automatically.

Where Rankings Actually Break

The failure points are predictable. Changed URL slugs break the addresses Google has indexed and other sites have linked to. Metadata resets to template defaults, so pages that had written titles and descriptions suddenly publish with generic ones. Internal links point to pages that were renamed or dropped. A noindex setting from the staging phase stays switched on after launch, telling Google to ignore the site. Structured data built up on the old site doesn't get recreated, so rich results eligibility disappears.

None of these failures announce themselves. The new site looks better than the old one, loads fine, and passes a casual visual check. Traffic then declines over the following weeks, and by the time you investigate, you're diagnosing from memory instead of from a checklist.

SEO Checks to Pass Before and After the Switch

Check Where to Look Pass Condition
URL slugs Page settings on old and new site Same slug for every page you keep
Redirects for changed URLs Redirect manager in the new site's SEO settings Every changed old URL has a 301 redirect to its new page
Page titles and meta descriptions SEO settings on each page Copied exactly, not left as defaults
Indexing and noindex tags SEO and site visibility settings Pages you want indexed are not set to noindex
Structured data Page markup on the new site Same schema types present as on the old site
Internal links Menus, footer and in-text links No links point to old or removed pages
Sitemap and robots.txt Sitemap URL and robots file New sitemap submitted in Google Search Console
Mobile layout Mobile preview on a phone Navigation and forms work on a small screen

Work the table row by row on the replacement site, fix every failure before launch, and retest after the domain moves. A check that passed on the staging address can still fail once the live domain is attached. This mirrors the discipline in solid technical SEO best practices, where verification happens on the live URL, not just the preview.

Redirects for URLs That Must Change

Sometimes a slug has to change, because the old one was wrong or the page is being merged with another. Set a 301 redirect from the old address to the closest matching new page. Then test a sample of old URLs in your browser and confirm each one lands on the right page rather than the homepage.

Say a service page moves from /services to /our-services with no redirect. Every link pointing to /services hits a dead page, and the ranking that URL built up drains away within weeks. The same rename with a 301 in place sends visitors and link value to the new address, and the page keeps most of its standing.

A redirect to the homepage is better than a dead page, but it's still a weak answer. Send each old URL to the page that replaced it.

After the Domain Moves

Submit the new sitemap in Google Search Console and request indexing for your key pages, starting with the homepage and your top landing pages. Then watch the coverage and performance reports for several weeks. Look for pages dropping out of the index, impressions falling on pages you didn't intend to change, and crawl errors on old URLs.

Don't panic over small day-to-day movement, because some fluctuation after a rebuild is normal. Do act fast on clear signals, such as a whole section vanishing from the index or a top page returning an error. Those point to a fixable setting or a missing redirect, and every week they sit unfixed costs you visibility that's slower to win back.

Test, Reconnect Automations and Move the Domain

Test everything on the replacement site while the domain still points at the old one. You get one period where mistakes cost nothing, and this is it. Place a test order if you run a store, submit every form and confirm it reaches your inbox, and confirm your analytics tags fire on a test visit. Check the cookie banner, load speed, and each page on a real phone, not just the editor's mobile preview.

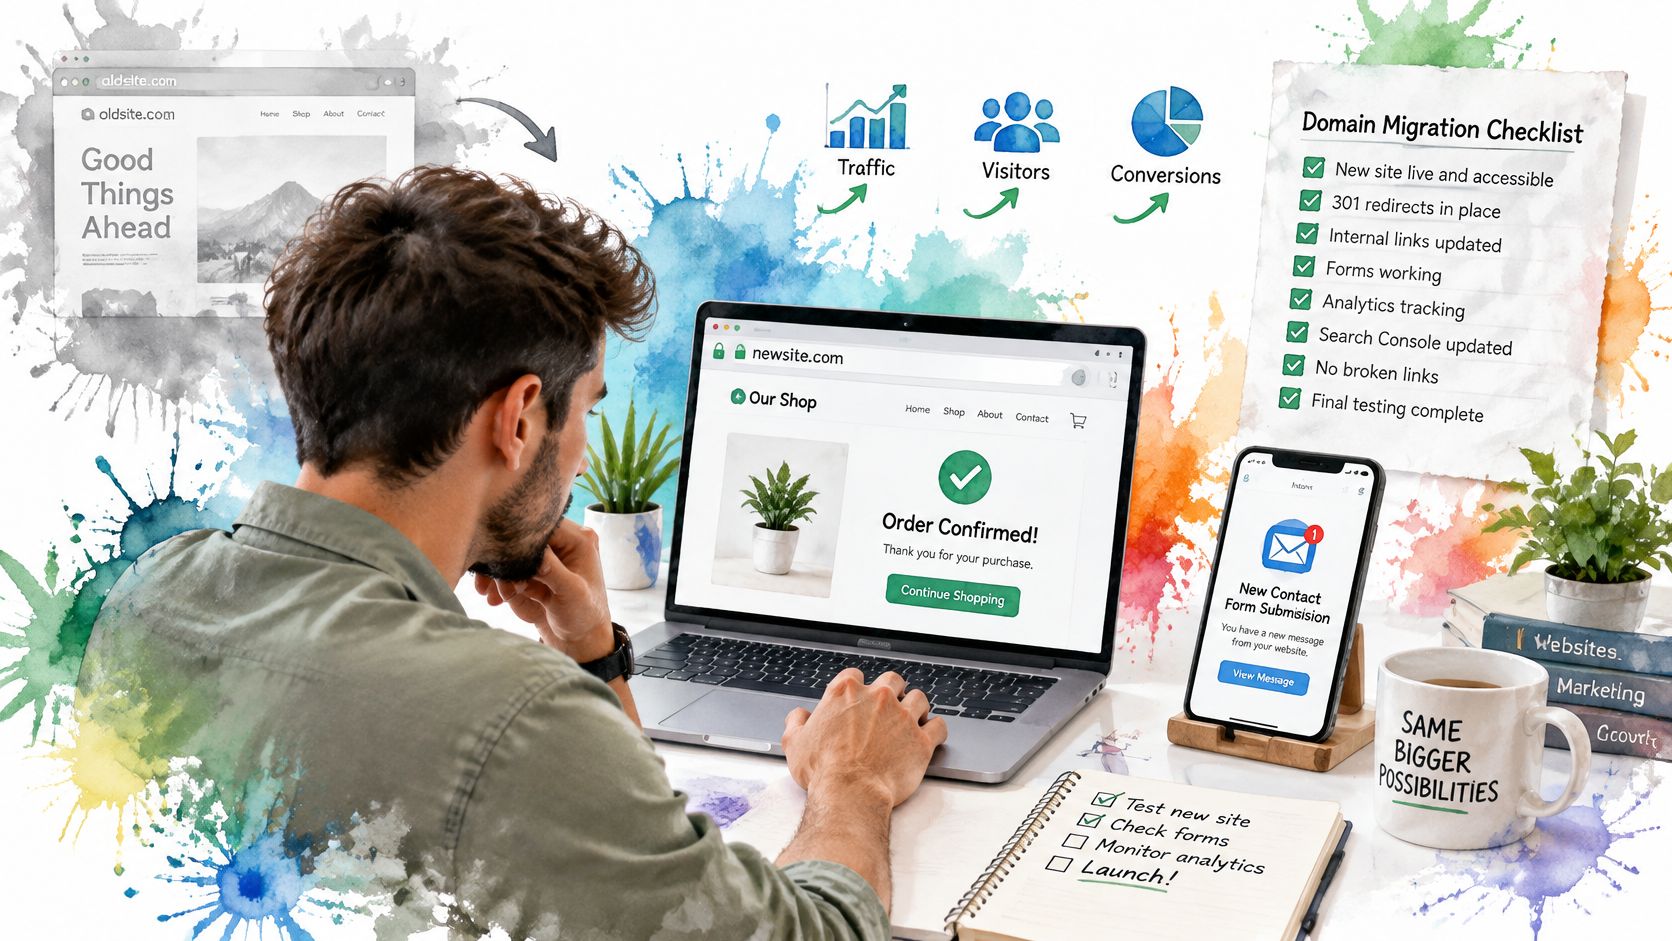
A professional developer managing a website migration process with a laptop, mobile notifications, and a checklist.

Read each page slowly on that phone. Tap every button, open every menu, and try to complete the main action a visitor would take, whether that's booking, buying, or sending an enquiry. Mobile problems hide in templates because the desktop view gets all the attention during the build.

Automations Break Silently

Automations are where migrations fail without anyone noticing. A scheduled blog post, a webhook, or an email sequence connected to the old site doesn't error loudly, it just stops. You find out weeks later when you wonder why publishing went quiet.

  • List every connection: Write down each automation, webhook, and scheduled post tied to the old site, with the tool it lives in.
  • Pause before the switch: Stop scheduled activity so nothing publishes to the wrong site or fails mid-move.
  • Reconnect to the new site: Point each tool at the replacement using its API key and Site ID, since the new site is a different site as far as integrations are concerned.
  • Publish a test post: Confirm it appears on the new site with the right URL, categories, and metadata before trusting the connection.
  • Log and reschedule: Keep a short record of what was reconnected and when, and reschedule paused posts only after the test post is live.

Check the connection inside the tool's own dashboard, not just on your site. Websites are managed from the customer's dashboard in AutoSEO, and that same principle applies everywhere, the sending tool has to show a healthy connection to the new site before you rely on it. A green status there plus a visible test post on your site is real confirmation.

The Go or No-Go Rule

Practical rule: Move the domain only when every item on your transfer checklist is complete, every SEO row passes, a sample of old URLs returns 301 responses to the right pages, test orders and forms succeed, and your test post is confirmed live.

If any one of those fails, you don't launch that day. I would rather delay a launch by a few days than spend the following month diagnosing lost enquiries. The old site keeps earning while you fix the problem in private.

Move the Domain and Premium Plan

When the rule passes, reassign the domain and Premium plan to the new site and confirm the domain resolves to the replacement. Visit the live address on desktop and phone, click through your main pages, and submit one more form for certainty. Keep the old site unpublished rather than deleted for a short fallback period, so you can still consult it or copy anything you missed.

Treat the first days like a soft opening. Run through the essentials from this new site SEO checklist as a final pass on the live domain, because settings that looked right in preview can behave differently once published. Submit the sitemap, verify indexing, and recheck your redirect sample against the actual URLs.

Watch the First Four to Six Weeks

For four to six weeks, watch Search Console, traffic, and form submissions on a regular rhythm. Compare against the baseline you recorded before the build, page by page for your top landing pages. When numbers drop, check redirects and indexing first, because those two causes explain most migration losses and both are fixable.

Keep an eye on submissions and orders too, not just traffic. A site can hold its rankings while a reconnected form sends leads to the wrong inbox. Revenue and enquiry counts are your real success measures, and they catch operational failures that search data won't show.

Once the switch is stable, ongoing monitoring keeps small problems small. AutoSEO connects to a Wix site directly using an API key and a Site ID, and it can be connected to a CMS in under 10 minutes, so rankings and fixes after the switch can be tracked from one place rather than by manual spot checks.


Changing your Wix template means rebuilding on a new site, and AutoSEO helps you protect what that rebuild puts at risk by monitoring rankings, flagging technical fixes, and keeping content publishing on schedule after the domain moves. Connect your new Wix site with its API key and Site ID, review your priority fixes, and let the post-launch checks run from one dashboard. Visit AutoSEO to set up monitoring before your next template change goes live.

Related Articles

Wix Website Portfolio

## Introduction to Wix Website Portfolio A Wix website portfolio refers to a type of website created using the Wix platform that showcases an individual's or organization's work, projects, and achieve

6,611 words5 min

Ecommerce Website

## Introduction to Ecommerce Websites An ecommerce website is a platform that enables businesses to buy and sell products or services over the internet, providing a seamless and convenient shopping ex

6,345 words5 min

Free AI Website for Content Writing: Top Tools Compared

What Makes a Free AI Website for Content Writing Actually Useful A free AI website for content writing serves a specific purpose: it generates, refines, or expands written content without requiring pa

6,145 words32 min read

Earning Website

## Introduction to Earning Websites An earning website is a type of online platform designed to generate revenue through various monetization strategies, such as advertising, affiliate marketing, spon

5,768 words5 min

Best AI Website for Content Writing: Top Tools Compared

What Makes a Legitimate AI Content Writing Tool Worth Using Choosing an AI writing tool requires understanding what these systems actually do and what they cannot do. Most AI content writers generate

5,202 words27 min read

Keyword Research Template: Organize & Prioritize

What Is a Keyword Research Template and Why It Matters A keyword research template is a structured document or spreadsheet designed to collect, organize, and analyze keyword data during the search eng

5,050 words26 min read

Stop doing SEO by hand

Build your SEO content plan with AutoSEO

Scan your site, build a keyword plan, and AutoSEO writes your plan's articles. Review the drafts and connect your site for publishing. $39/mo per website, cancel anytime, 30-day money-back guarantee.

$39/mo per website · Cancel anytime · 30-day money-back guarantee